
I am not a very artistic person, but because I give everything a go I decided to try some projects out with my son that involve cardboard box crafts for kids who are young and eager to play alongside others.
There are 3 projects below for all those of you who have cardboard boxes around the house and wish to use them creatively and give them a new purpose.
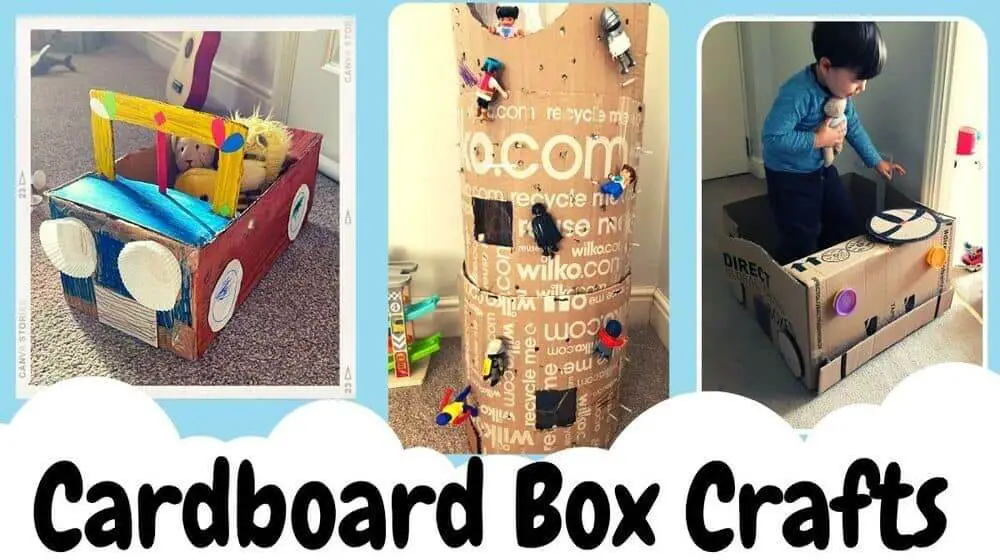
Cardboard car
Because we were bored inside, one day I started pushing my son around the house while he was driving his imaginary cardboard car. I felt I needed to make him a real cardboard car and here it is. See the details below!
Materials needed
Gather everything you need: cardboard boxes, scissors, glue, paints, markers, two tiny jars for lights.
Instructions
First, get a large cardboard box and cut out wheels, a stirring wheel, and make holes for the lights. Cut the cardboard to a preferred height.
Do not cut one of the sides (the one in which you cut the holes for the lights), but fold it inside. This will be the dashboard.
Next, attach the wheels, lights, and stirring wheel. To make the stirring wheel flexible, I cut out a cardboard leg, attached the stirring wheel to it, and pierced the leg into the dashboard.
Finish off the design
The fun part is that your children can help you decorate the cardboard car. I let my son draw the inside of the car and we will soon paint the outside of it.
So that’s a fun and quiet activity in itself. But using it is what they are looking forward to.
My son drives his teddy around and shows him different things. Your children will decide what is the best game to play with it.
Tiny Cardboard Car for Toys
I had a small cardboard box and my son started pushing it around with toys in it. I asked him why he was doing that and he said that he was driving teddy and lion around. That’s how I decided to started another cardboard box craft, tinier this time.
Materials needed
small cardboard box
scissors, paints and brushes
4 small paper circles for wheels
two paper cupcake liners
popsicle sticks for the windscreen
Instructions
First, cut out the upper sides of the box. Leave only the back upper part to fold inside. Once you fold it inside, glue on the bottom a narrow cardboard strip to prevent the folded part from moving.

Start painting all of it. My son loved this part. We let it dry off for a few hours while we had lunch and played other games.
Once it is dry, glue the wheels in place and colour them. Next, you can attach the lights (the cupcake liners).
Once those dried off, I glued a small piece of cardboard at the front to make a tiny dashboard. I then cut holes in the dashboard to insert the windscreen.
I glued some popsicle sticks and cardboard strips together as in the picture below. I inserted them in the tiny holes and that was it. the car was done!
Tower of possibilities
A few weeks ago I decided to build a rocket with some cardboard boxes I had around the house. And as I was working on making it, my son and I decided that it looked better as a tower.
A project emerged: my son got inside it, then we decided to add windows to look out and many other elements as you will see below.
Materials needed
cardboard boxes
scissors
glue
pipe cleaners
laminated pouches
pencils
Christmas lights
figurines
Instructions
Cut out strips of cardboard and roll them up as in the example above. At first my son played with the parts while I was striving to tie them together. I used glue and pipe cleaners to make it sturdier.
My son climbed in and out of the tower ones all parts were assembled. That’s when he realised he would like some windows.
So I cut a larger oval one and smaller rectangular ones. I used laminated pouches over the holes to make them look like real window.
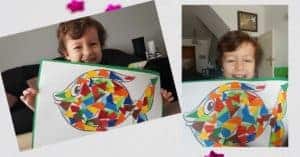
Need a simple and colourful crafts idea for little hands? try our Mosaic fish craft for kids. The template you see below is free and easy to download.
Then we drew on the tower and the windows.My son used a flashlight when going inside the tower. I decided to turn the lights off and moved the tower so that the window would be facing the wall.
When flashing the picture on the windows, we could see the shadows on the wall and the drawings. My son was fascinated.
While I was attaching the windows with velcro dots, my son started punching holes in the tower with pencils. I didn’t get angry or upset for ruining my work, because he was in fact improving it. We were both involved in the creation process and it kept on expanding.
This gave me an idea to decorate the tower with lots and lots of pencils as in the picture below. When he had enough of the pencils, a few hours later my son took them off. Which gave us a new opportunity for further exploration.
Those tiny holes were perfect for the hands of Playmobil people. Even some other figurines we had.
So, my son started off by hanging a knight in the hole and I started shouting for help. A play episode emerged: I needed rescuing. Other knights, firemen, drivers and all kinds of people came to the tower and tried to climb it to get me down safely.
A princess even appeared by the window calling for help. Then a dragon flew past blazing fire and threatening the knights. It was tremendously fun!
And finally, as it started to get darker outside, we decided to use our Christmas lights and make good use of the holes we enjoyed making. I pushed the tiny lights through the holes and made the tower into our night lamp.
I intend to build it all the way to the ceiling and we will see what other possibilities arise.
Don’t forget!
Playing with recyclable materials inspires children to become more creative and resourceful, to engage in open-ended play because recycled materials are open-ended toys.
Children become aware of their abilities and get a feeling of accomplishment which makes them feel empowered. And also they learn that we can protect the environment and that our actions matter and have an effect, so while involved in the activity talk to your children about helping the planet.
Join our Facebook group Learning Activities for Kids and make parenthood easier!

Hi. I am Monica, an experienced ESL teacher and early years student, mother to a preschooler and passionate reader.
Love, love, love this! We are all about cardboard box crafts!
I LOVE the car idea ! I can see my kids going crazy over it ! What a fun idea !